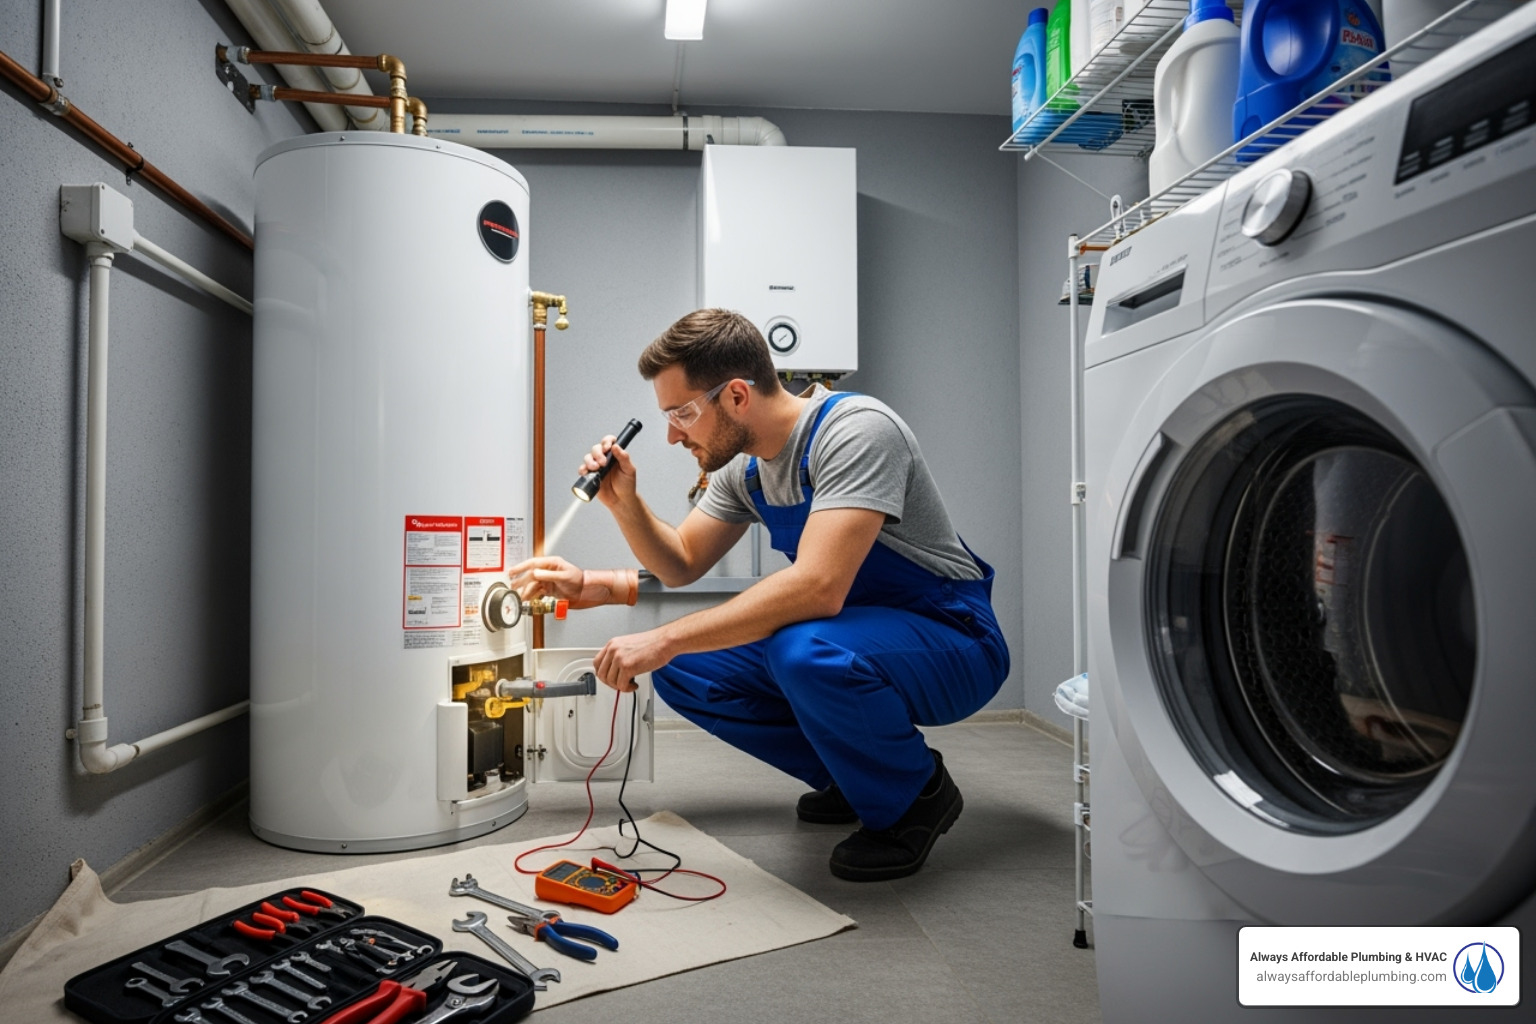
09 Sep Keep Your Hot Water Flowing: A Guide to Water Heater Maintenance
Why Your Water Heater Deserves Your Attention
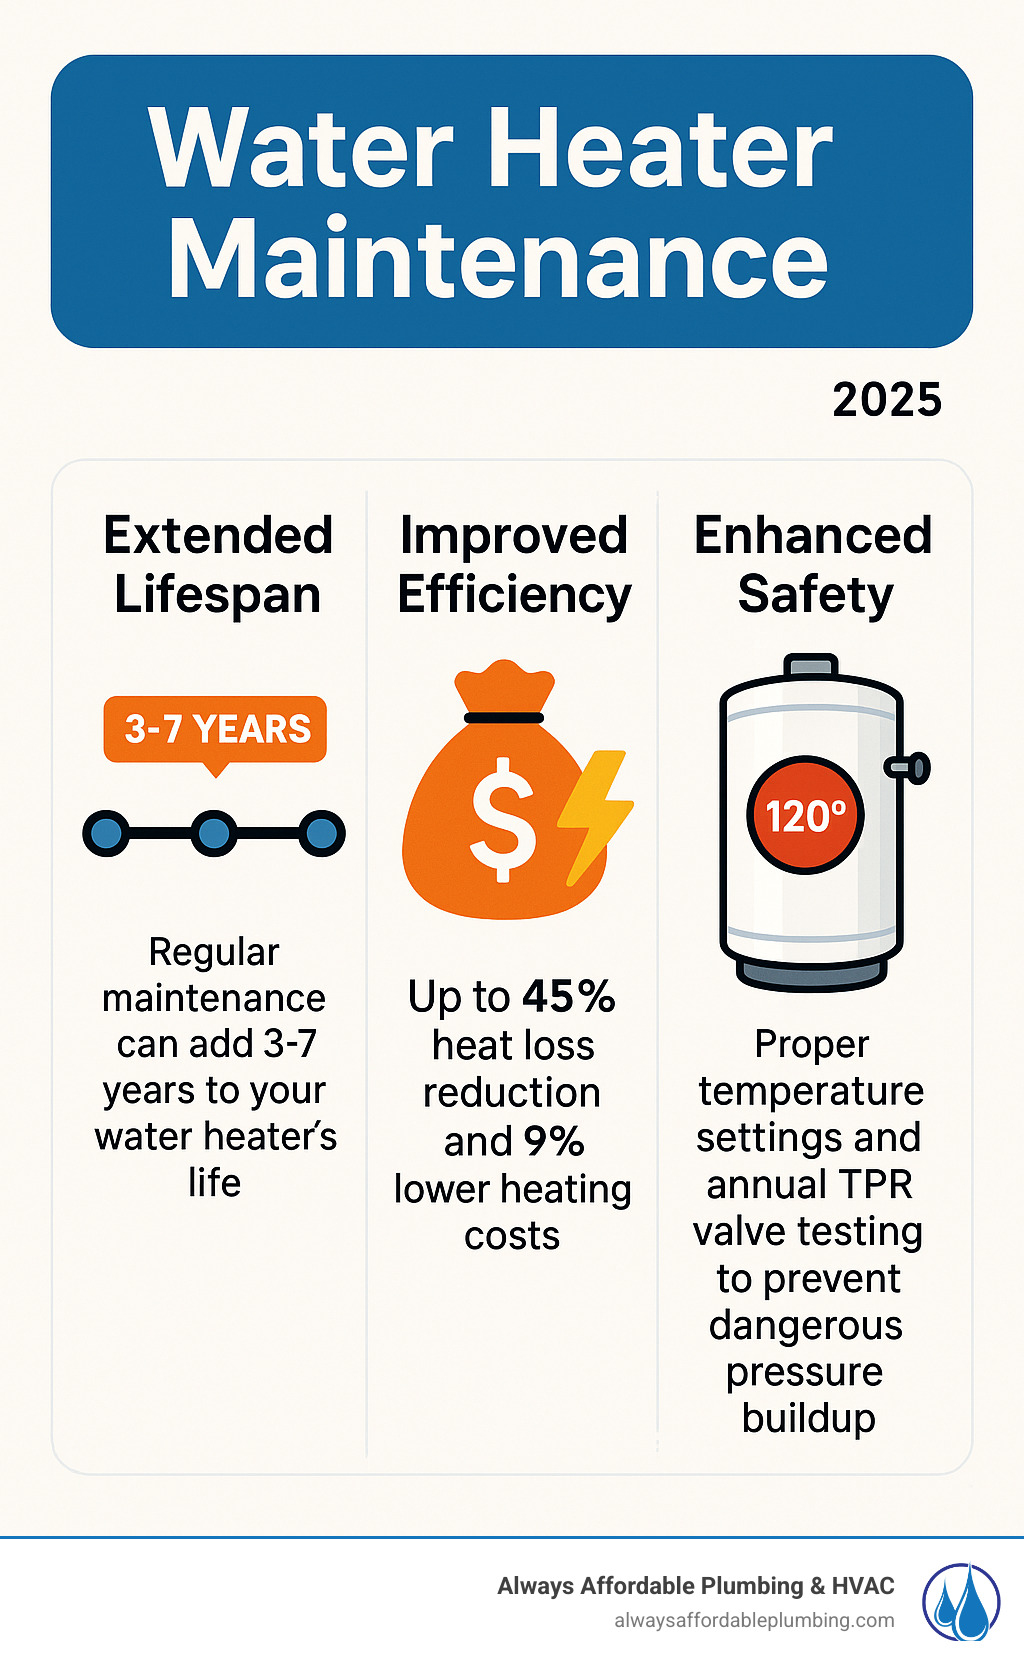
Water heater maintenance is key to ensuring reliable hot water and avoiding costly emergency repairs. As one of your home’s hardest-working appliances, your water heater benefits greatly from annual attention. A few simple tasks can extend its life from 8-12 years to 15+ years, cut energy bills, and prevent catastrophic failure.
Key maintenance tasks include:
- Flushing sediment from the tank annually.
- Testing the temperature and pressure relief (TPR) valve.
- Inspecting the anode rod every 3 years.
- Adjusting the temperature to a safe and efficient 120°F.
- Checking for leaks and unusual noises.
This guide will walk you through everything you need to know to maintain your gas, electric, or tankless water heater, helping you keep the hot water flowing for years to come.
Why Regular Maintenance is Non-Negotiable
Most people ignore their water heater until a cold shower forces them to pay attention. But proactive water heater maintenance is about more than just comfort; it’s an investment in your home’s safety and your budget. Regular care boosts energy efficiency, lowers utility bills, extends your appliance’s lifespan, and improves water quality.
Perhaps most importantly, it helps prevent catastrophic failures like tank ruptures or gas leaks that can endanger your family and cause thousands in property damage.
The Enemies Within: Sediment and Corrosion
Inside your tank, a constant battle is waged against mineral deposits. Sediment (sand, calcium, etc.) settles at the bottom, forming an insulating layer that forces your heater to work harder, wasting energy and increasing your bills. This is the primary cause of reduced efficiency and strange popping noises.
This sediment buildup also accelerates corrosion. To combat this, a sacrificial anode rod is installed in your tank. It attracts corrosive elements, protecting the steel tank walls. However, this rod wears out over time and requires periodic inspection and replacement. Without a functional anode rod, your tank will rust from the inside out, leading to leaks and premature failure.
Telltale Signs Your Water Heater Needs Attention
Your water heater will give you warning signs when it needs help. Acting on them early can save you from an emergency replacement.
- Lukewarm Water: Often the first sign of trouble, indicating sediment buildup or a failing heating element.
- Discolored or Rusty Water: A red flag for rust inside the tank or a depleted anode rod.
- Leaks or Moisture: Any puddle around the base needs immediate investigation to prevent water damage.
- Low Hot Water Pressure: Suggests sediment is clogging your tank’s outlet or your home’s pipes.
- Strange Odors: A metallic smell points to corrosion, while a rotten egg odor often means bacteria are reacting with the anode rod.
- Unusual Noises: Listen for popping or rumbling (sediment), sizzling (a leak hitting a hot surface), or whining (scale buildup on heating elements).
Getting Started: Safety, Tools, and Anatomy
Before starting any water heater maintenance, proper preparation is essential for a safe and successful outcome. Your water heater combines water, high heat, and either gas or electricity, so taking the right safety precautions is non-negotiable.
Safety First: Powering Down
Never work on a live water heater. Always power it down completely before you begin.
- For electric heaters: Go to your home’s electrical panel and flip the water heater’s circuit breaker to the “OFF” position. It’s often a larger, double-pole breaker.
- For gas heaters: Find the gas supply valve on the pipe leading to the unit and turn the handle so it’s perpendicular to the pipe, cutting off the gas. You can also turn the control dial on the unit itself to “OFF.”
Next, shut off the cold water supply using the valve on the inlet pipe at the top of the tank. Finally, open a hot water faucet somewhere in your house and let it run until the water is cold to release any pressure in the system. Always wear work gloves and safety goggles.
Essential Tools for Water Heater Maintenance
Having these tools on hand will make the job much easier:
- Garden hose
- Bucket
- Channel-lock pliers
- Screwdriver set (Phillips and flathead)
- Anode rod socket (typically 1 1/16-inch)
- Teflon tape (plumber’s tape)
- Work gloves and safety goggles
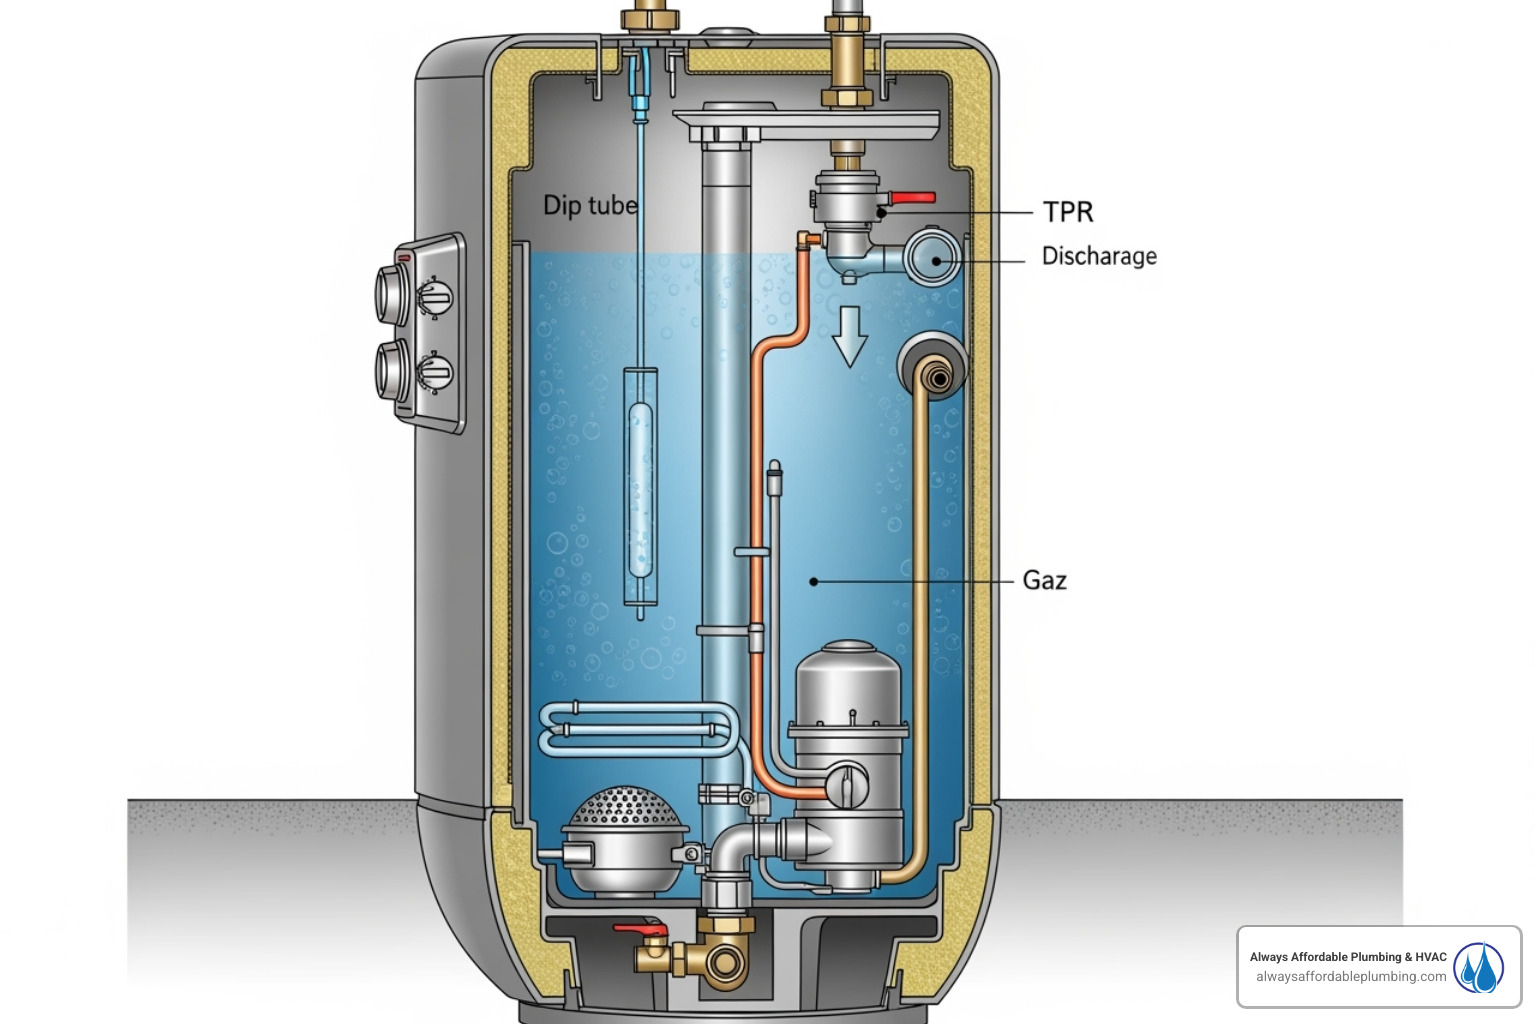
Understanding Your Water Heater’s Anatomy
Knowing the basic parts will help you understand the maintenance steps.
- Tank: The insulated cylinder that holds the water.
- Heating System: Either electric heating elements submerged in the water or a gas burner assembly at the base.
- Thermostat: The brain that controls the water temperature.
- Anode Rod: A sacrificial rod that hangs in the tank to prevent corrosion.
- Dip Tube: A tube that directs incoming cold water to the bottom of the tank for heating.
- Drain Valve: A valve at the bottom used to flush sediment.
- TPR Valve (Temperature & Pressure Relief): A critical safety valve that releases excess pressure.
- Shut-off Valve: Controls the cold water supply into the tank.
Your Essential Water Heater Maintenance Checklist
With your tools gathered and safety precautions taken, you’re ready to perform the essential water heater maintenance tasks. Following these annual procedures will keep your unit running efficiently and reliably.
Step 1: Flush Sediment from the Tank
Sediment buildup forces your heater to use more energy and is the primary cause of popping noises. Flushing removes this sludge, restoring efficiency. This should be done annually, or every six months in areas with hard water.
- Power Down: Turn off the power (electric) or gas supply (gas).
- Shut Off Water: Close the cold water inlet valve.
- Relieve Pressure: Open a nearby hot water faucet until the water runs cold.
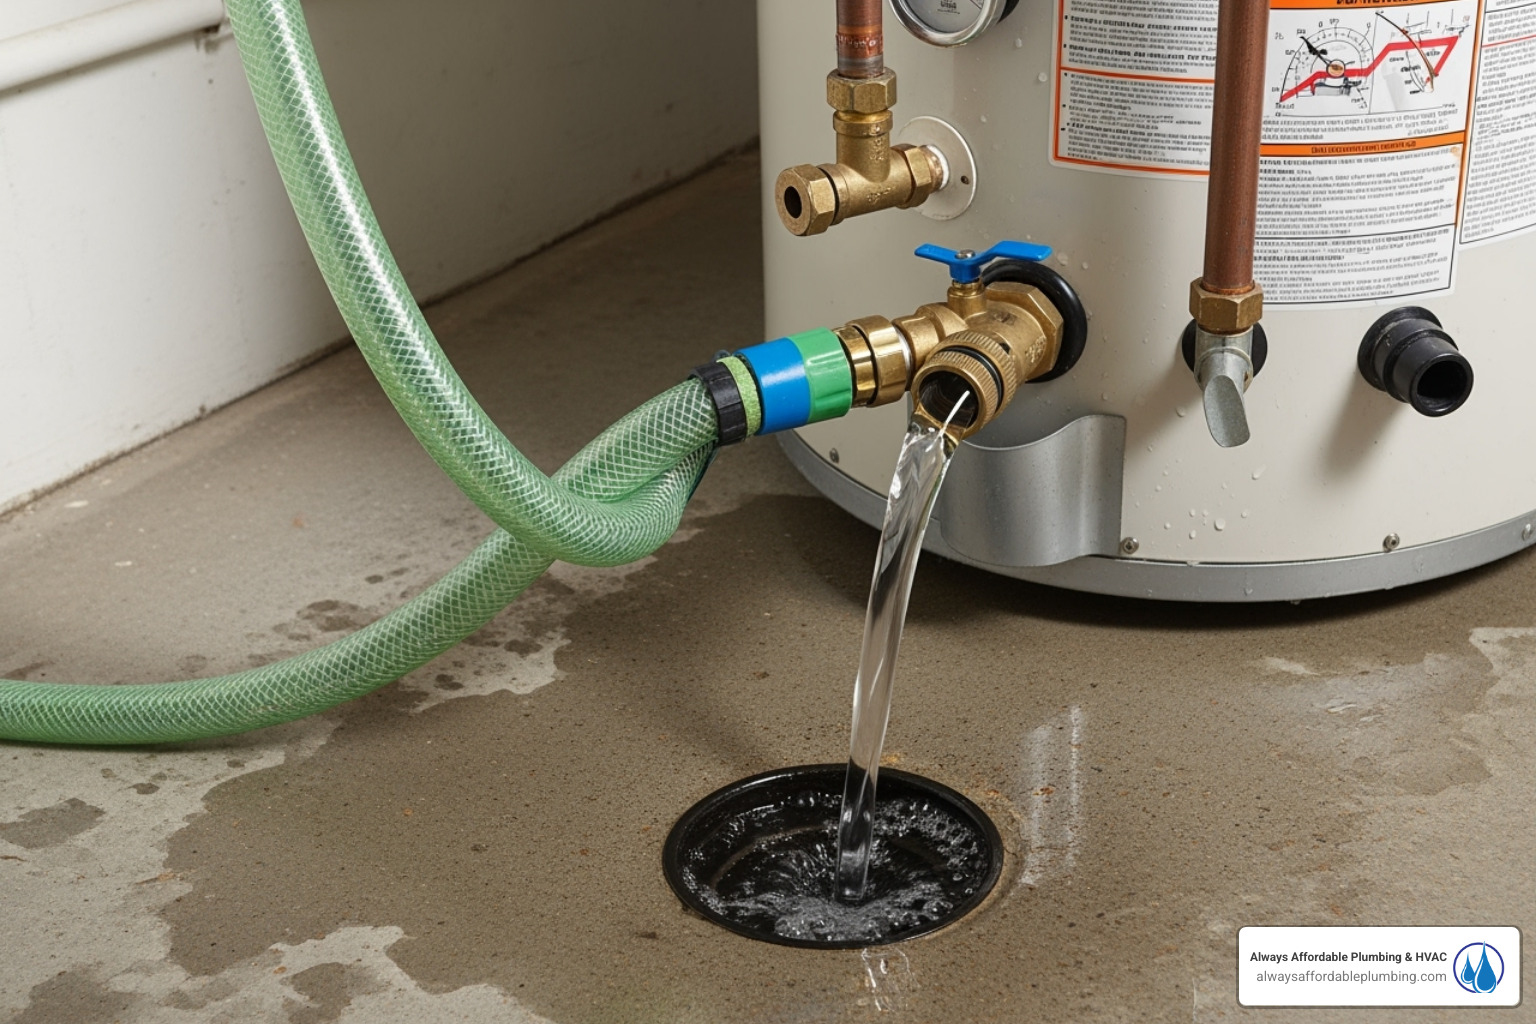
- Drain: Connect a garden hose to the drain valve at the bottom of the tank and run it to a floor drain or outside. Open the valve. You can lift the TPR valve lever briefly to let air in and speed up draining.
- Flush: Let the tank drain until the water runs clear. If flow slows, you can briefly open the cold water supply for a few seconds to stir up sediment (a “power flush”).
- Refill: Close the drain valve, disconnect the hose, and open the cold water supply to refill the tank. Leave the hot water faucet open to purge air from the system. Once water flows steadily from the faucet, the tank is full.
- Restore Power: Turn the electricity or gas back on.
Step 2: Test the Temperature and Pressure (TPR) Relief Valve
Your TPR valve is a critical safety device that prevents the tank from over-pressurizing. Test it annually.
Place a bucket under the discharge pipe. Briefly lift the valve’s lever. A burst of hot water should come out. When you release it, the flow should stop completely. If little or no water comes out, or if it continues to drip after the test, the valve must be replaced immediately.
For a comprehensive guide covering all aspects of water heater care, you can Download a maintenance summary.
Step 3: Inspect and Replace the Anode Rod
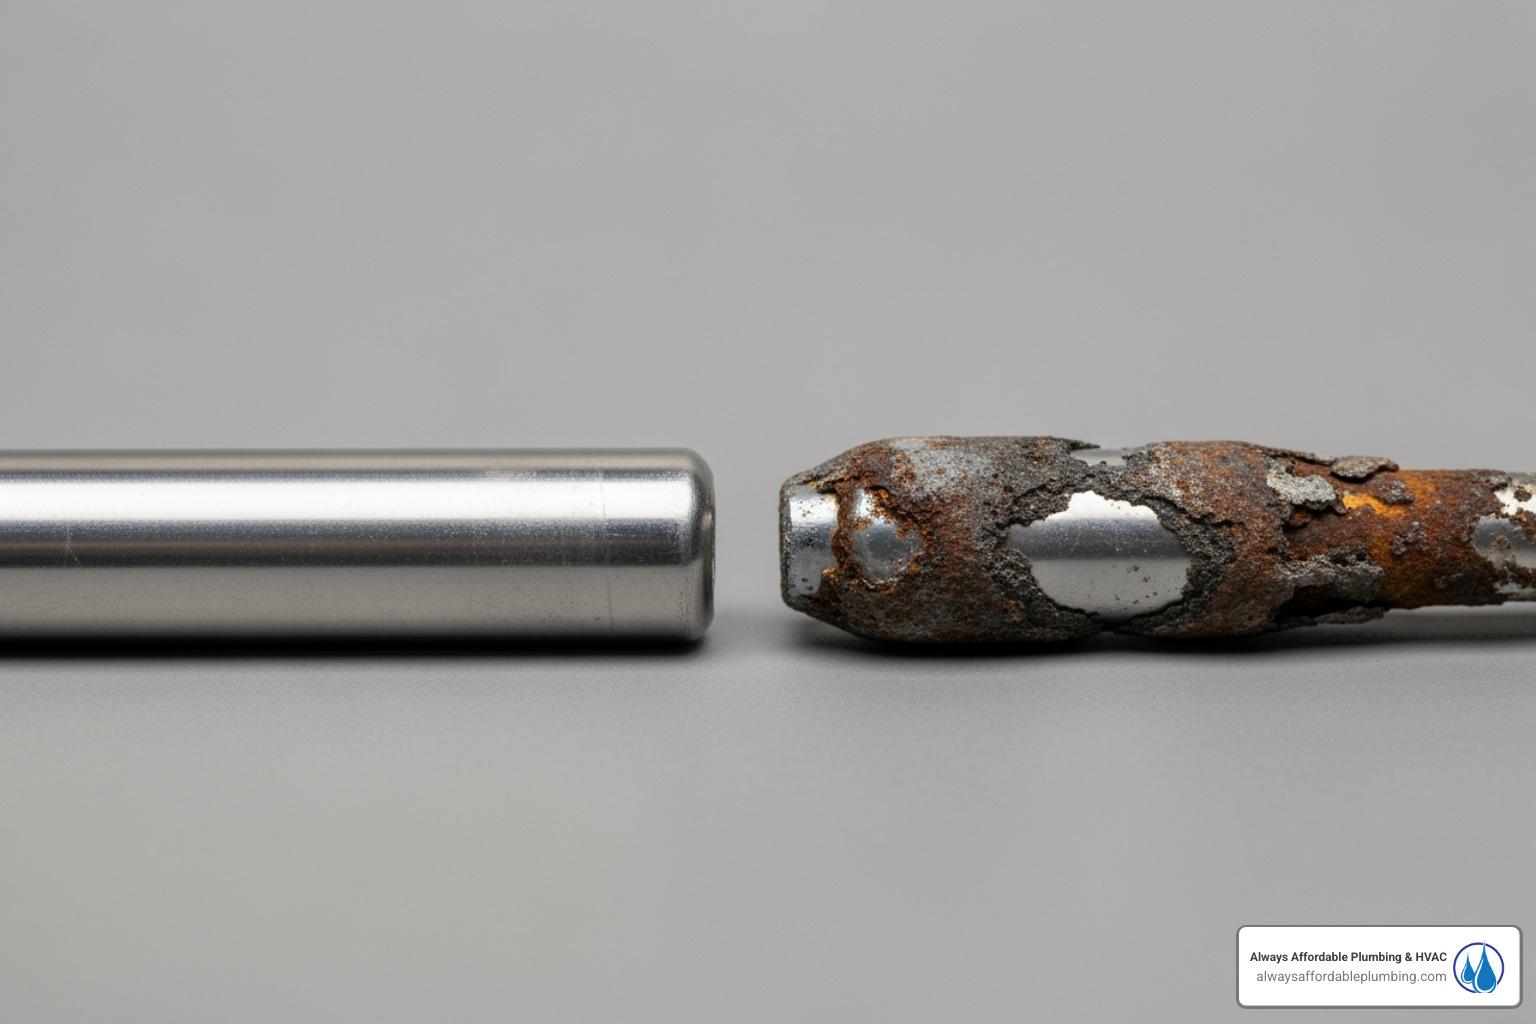
The anode rod is your tank’s bodyguard, sacrificing itself to prevent rust. When it’s gone, your tank starts to corrode. Inspect it every three years.
After shutting down the unit and draining a few gallons of water, use a 1 1/16-inch socket to unscrew the rod from the top of the tank. This may require significant force.
Replace the rod if it is less than half an inch thick, heavily pitted, or if you can see the steel core wire. When installing a new one, wrap the threads with Teflon tape. If headroom is tight, flexible, segmented anode rods are available.
Step 4: Adjust Temperature & Insulate for Efficiency
Most households only need water heated to 120°F. Settings higher than this (many are factory-set to 140°F) waste energy and increase the risk of scalding. For every 10°F you lower the temperature, you can save up to 5% on water heating costs.
- Electric Heaters: Turn off the power, remove the access panels, and use a screwdriver to adjust both thermostats to 120°F.
- Gas Heaters: Simply turn the temperature dial, usually located near the bottom of the tank, to the 120°F setting.
If your tank feels warm to the touch, it’s losing heat. An insulating blanket can reduce this heat loss by up to 45%. Also, consider insulating the first few feet of your hot and cold water pipes with foam sleeves. Never cover safety labels or air intakes on a gas unit.
For more ways to save energy, check out this Energy Saving Advice.
Maintenance Differences: Gas, Electric & Tankless Heaters
While some maintenance is universal, each type of water heater has unique needs. Understanding these differences ensures your unit gets the specific care required for a long, efficient life.
| Maintenance Task | Tank (Gas) | Tank (Electric) | Tankless |
|---|---|---|---|
| Flushing Sediment | Annually (more for hard water) | Annually (more for hard water) | Not applicable (no tank) |
| Descaling (Mineral Buildup) | Indirectly via flushing | Indirectly via flushing | Annually (or more for hard water) |
| TPR Valve Test | Annually | Annually | Not applicable (no tank) |
| Anode Rod Inspection/Replacement | Annually/Every 3 years (tank protection) | Annually/Every 3 years (tank protection) | Not applicable (no tank) |
| Pilot Light/Igniter Check | Yes (relighting procedure) | No | No |
| Venting Inspection | Annually (carbon monoxide) | No | Annually (proper exhaust) |
| Air Intake Cleaning | Annually (FVIR system) | No | Annually (inlet filter) |
| Heating Elements Check | No | Annually (ensure water level) | No |
| Electrical Connections | Annually | Annually | Annually |
| Lifespan Expectancy | 8-12 years | 10-15 years | Up to 20 years |
Gas Heaters
Gas heaters require attention to their combustion system.
- Pilot Light/Igniter: Know the relighting procedure on your unit in case the pilot light goes out.
- Venting Inspection: Annually check the flue pipe for rust, blockages, or disconnected joints. Poor venting can lead to dangerous carbon monoxide buildup in your home.
- Air Intake Cleaning: On newer units with a Flammable Vapor Ignition Resistant (FVIR) system, the flame arrestor at the base can get clogged with dust, starving the burner of air and causing shutdowns.
Electric Heaters
Electric models are simpler but have their own electrical safety needs.
- Heating Elements: Never turn on an electric water heater unless the tank is completely full of water. Running the elements dry will burn them out instantly.
- Electrical Connections: Annually check the connections at the thermostats and heating elements for tightness and corrosion.
Tankless Heaters
Tankless units can last up to 20 years but require specific maintenance.
- Descaling: Instead of flushing, tankless units need to be descaled annually (more often in hard water areas) to remove mineral buildup from the narrow heat exchanger passages. This involves circulating a descaling solution (like vinegar) through the unit with a pump.
- Inlet Filter Cleaning: Clean the small water inlet filter screen regularly to prevent clogs that restrict water flow.
In areas with hard water like Sacramento, neglecting to descale a tankless unit can void the warranty and lead to system failure.
Frequently Asked Questions about Water Heater Care
We’ve helped countless homeowners with their water heaters and find the same questions come up often. Here are answers to the most common ones.
How often should I perform water heater maintenance?
Annual flushing and inspection is the standard for water heater maintenance. This yearly routine should include flushing sediment, testing the TPR valve, and checking the anode rod and temperature settings. If you live in an area with hard water, like many communities in the Sacramento area, you should flush the tank every six months. Always check your manufacturer’s manual for model-specific recommendations.
What do different noises from my water heater mean?
Unusual sounds are your water heater’s way of asking for help.
- Popping or Rumbling: This is the classic sound of sediment buildup. Steam bubbles are forming under the sediment layer and bursting through.
- Sizzling: This usually indicates a water leak is dripping onto a hot surface, like the burner or heating element.
- Whining: A high-pitched whine often points to scale buildup on electric heating elements or restricted water flow.
- Gurgling: While normal during draining, persistent gurgling can signal problems with water flow or internal components.
Can I do this myself, or should I call a professional?
Many basic tasks are DIY-friendly. Flushing the tank, testing the TPR valve, and adjusting the temperature are all manageable for most homeowners with basic tools. This guide is designed to help you tackle these jobs safely.
However, some jobs are best left to professionals. Anode rod replacement can be difficult if the rod is seized. Replacing a TPR valve is a critical safety task that must be done correctly. For any persistent leaks, gas line issues, or complex problems, calling a pro is the safest choice.
Tankless water heater descaling is another task where professional service is often recommended. Plumbers have the specialized pumps and solutions to do the job thoroughly without risking damage to the unit. At Always Affordable Plumbing & HVAC, we’re here to help when you need professional expertise. When in doubt, give us a call.
Conclusion: Protect Your Investment and Ensure Comfort
Regular water heater maintenance is not just a chore; it’s a smart investment in your home’s comfort, safety, and efficiency. By performing a few simple tasks each year, you can extend your water heater’s life by several years, lower your energy bills, and prevent the stress and expense of an emergency failure.
Proactive care always beats reactive repairs. Taking an hour or two for maintenance can save you from a cold shower on a busy morning and the high cost of an unexpected replacement. We hope this guide has empowered you to take control of your home’s hot water system.
When you encounter issues that require professional expertise, Always Affordable Plumbing & HVAC is ready to help. We proudly serve homeowners throughout Sacramento, Roseville, Folsom, Rancho Cordova, Elk Grove, Davis, Rocklin, and the surrounding communities, including Vineyard, Gold River, Fair Oaks, East Sacramento, Land Park, Natomas, Solano County, Sacramento County, Citrus Heights, Carmichael, North Highlands, Orangevale, Antelope, Lincoln, Woodland, West Sacramento, Galt, Granite Bay, Rio Linda, Elverta, Auburn, Loomis, Penryn, Wilton, Herald, Newcastle, Winters, Mather, Yolo, McClellan, Represa, and Sloughhouse. Our commitment is to provide quality, transparent, and affordable service.
Learn more about our tankless water heater services in Elk Grove, CA


