


Sewer Inspection in Davis, CA
Professional sewer camera inspection is the fastest, most accurate way to find hidden problems before they become disruptive and expensive. In Davis, CA, where older neighborhoods, abundant street trees, and seasonal winter rains combine to stress underground pipes, a targeted sewer inspection can identify blockages, root intrusion, breaks, and offsets so you can make informed repair decisions. This page explains when an inspection is needed, what a video camera diagnostic includes, how findings are reported, and the repair and maintenance options typically recommended for Davis homes.
Why and when a sewer camera inspection is needed
Sewer camera inspection is appropriate any time you suspect the main sewer line or branch laterals are compromised. Common triggers include:
- Repeated backups or slow drains in multiple fixtures
- Gurgling toilets or bubbling in floor drains
- Foul sewer odors in or around the home
- Lush, wet patches in the yard above the sewer line
- Homes built before 1980 or properties with large trees near the sewer routeInspections are also useful before buying or selling a home in Davis, after any excavation near your line, and as part of routine preventive maintenance for older or high-use systems.
Common sewer line problems in Davis, CA
- Tree-root intrusion: Davis neighborhoods feature mature oaks, elms, and other species whose roots seek moisture and can penetrate joints or cracked pipe. Root damage is one of the most frequent causes of partial or complete blockages.
- Grease and debris buildup: Kitchen grease and nonflushable items accumulate over years and narrow the pipe diameter.
- Cracks, breaks, and offsets: Age, ground movement, or nearby construction can cause sections of pipe to crack or separate.
- Bellies and sags: Sections of pipe that have settled create low spots where solids collect and block flow.
- Infiltration and inflow during rains: Heavy winter storms in Northern California can saturate soils and allow groundwater or stormwater to enter compromised sewer lines, worsening backups.
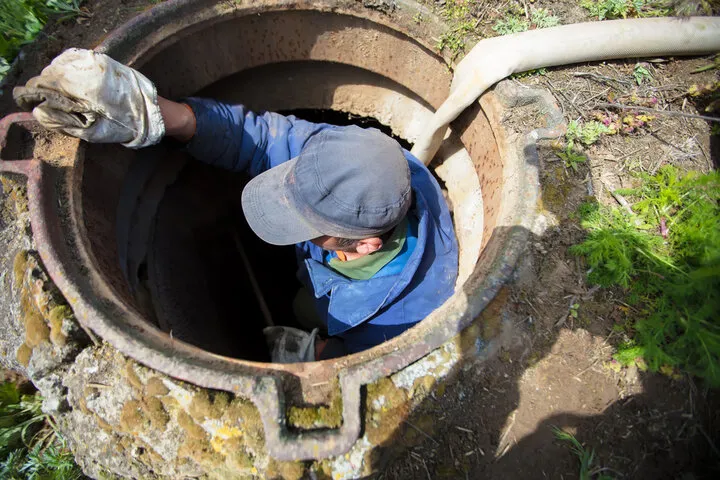
The sewer camera diagnostic: step-by-step
- Pre-inspection assessment - Technicians review symptoms, plumbing layout, and any relevant property history to plan access points and safety precautions.
- Access and setup - A cleanout or service opening is located. If none exists, the technician will determine the safest entry point for inspection equipment.
- Camera insertion - A high-definition, waterproof push camera mounted on a flexible cable is fed through the line. The camera transmits real-time video and positional data.
- Systematic survey - The technician advances the camera through the main and branch lines at a controlled speed, documenting pipe material, diameter, joints, and any defects. Distance markers on the cable record the exact location of findings.
- Targeted maneuvers - If a blockage or root mass is detected, the operator uses the camera to assess severity, structure, and extent. Additional passes before and after limited cleaning can confirm the source.
- Final walkthrough - The camera exits the line and the technician confirms that all inspected sections are reviewed and logged.
How technicians locate blockages, roots, breaks, and offsets
- Visual confirmation: The camera provides HD video of the interior surface, showing roots, cracks, corrosion, or collapsed segments.
- Distance markers: Cable footage includes foot or meter markers so the technician can pinpoint the exact location relative to the cleanout or foundation.
- Sonde or locator: For buried laterals or where precise surface marking is needed, the camera head contains a transmitter (sonde) that is traced aboveground with a receiver to map the sewer route and mark repair locations.
- Pressure and flow cues: Slow camera movement or visible standing water helps differentiate total blockages from partial obstructions.
Example footage and reporting deliverables
A complete inspection package typically includes:
- Time-stamped HD video files of the entire inspection route
- Still-image captures of defects (roots, cracks, grease, bellies)
- A written report summarizing findings, distance-to-defect, pipe material and diameter, and severity ratings
- A simple map or on-site markings showing the location of major issues
- Repair recommendations organized by urgency and expected optionsThese deliverables give homeowners and contractors a clear basis for decisions and permit applications if repairs require excavation.
Typical recommendations and repair options
Based on camera findings, common recommendations include:
- Cleanout installation - Adding an accessible cleanout for future inspections and maintenance.
- Hydro jetting or mechanical root cutting - For grease and root blockage that have not damaged pipe structure.
- Localized repair (spot repair) - Excising and replacing a damaged section when surrounding pipe is sound.
- Trenchless pipe lining (CIPP) - Applying a cured-in-place pipe liner when the existing pipe has multiple small defects but is otherwise continuous. This preserves landscaping and reduces excavation.
- Full replacement - Excavation and replacement recommended for severely broken, collapsed, or offset lines.
- Re-routing or repiping laterals - When offsets or persistent infiltration make repair impractical.Recommendations should include pros and cons of trenchless versus open-cut methods, with attention to surface restoration needs typical in Davis yards and tree roots.
Estimated timelines for inspection and repairs
- Camera inspection: Most home sewer camera inspections are completed in one visit, typically 1 to 2 hours including setup and reporting.
- Minor cleaning (snaking or hydro jetting): Often same-day work after inspection, typically a few hours.
- Spot repairs or localized excavation: Usually completed in 1 day to 3 days, depending on access and permits.
- Trenchless lining: Small to medium projects commonly require 1 to 2 days; larger mains may require longer.
- Full replacement: Timeline varies by length and complexity but generally ranges from several days to more than a week for longer runs, trench shoring, and surface restoration.Exact schedules depend on permit requirements, access, and the extent of root entanglement or damage.
Preventive maintenance tips for Davis homeowners
- Avoid flushing wipes and sanitary products; even labeled flushable wipes cause buildup.
- Do not pour grease or oils down kitchen sinks; use a disposal or collect for trash.
- Trim or consider removing problematic trees near sewer easements; species selection matters.
- Install or maintain an accessible cleanout for periodic inspections.
- Schedule a camera inspection if you experience signs of multiple slow drains or after significant landscaping or construction work.Regular preventive inspections can detect small issues before roots or bellies lead to backups and major repairs.
Emergency diagnostics and scheduling
Emergency diagnostics are used when a sewer backup is actively flooding fixtures or yard areas, or when raw sewage has entered the home. In those situations, a rapid sewer camera inspection prioritizes locating the blockage and determining whether a temporary cleanout or immediate mechanical clearing is feasible. Emergency visits follow safety protocols, and technicians prioritize containment and diagnostic imaging to guide immediate corrective action.To arrange an emergency diagnostic or a standard inspection, homeowners typically contact their local plumbing service through the provider’s emergency or online scheduling channels. Keep documentation of the inspection report for insurance or disclosure needs.
Sewer camera inspection in Davis, CA provides the clarity needed to choose cost-effective repairs, protect landscaping, and prevent recurring backups. With a clear video record and a prioritized repair plan, homeowners can address the exact problem rather than guesswork, saving time and limiting unnecessary excavation.
Other Services
Customer Testimonials
See what our satisfied customers have to say about their experience with Always Affordable
Plumbing & HVAC.

"Chappy was very skilled in his knowledge of my HVAC unit. I greatly appreciate the quick response and experienced tech. The whole endeavor was made less stressful by his humor and honest conversation. I find comfort in knowing I now have a shop i trust for the next time."
"Tony, James, Ronnie did an amazing job setting up our new AC! They were quick, efficient, considerate, and polite! We appreciate them scheduling us in on such short notice. Definitely recommend this company!"
"Prompt, professional service with kindness and care. They came out to address both plumbing and AC issues. I received a courtesy call before they arrived. All issues were resolved the same day with integrity and respect. Thankful for businesses like this. Absolutely recommend to those that I love."
"Excellent service! Jason came out promptly and in addition to doing my outside faucet he also put in new irrigation equipment! All done perfectly! Jason was lovely"
"Honest with the assessment; friendly and good manners. No high pressure sales. Just good to honest "tell it like you see it" Thought my kitchen disposer needed an overhaul. But Jason, there Plumber gave me an honest lesson on what was really happening. Saved me hundreds, if I went the route of replacing. Thank you!"
"Absolutely 5 stars. If you are looking for affordable ,professional and kind. Chappy was excellent and very knowledgeable . I called in the morning because my air conditioner stopped working he was here within hours and fixed my air with a smile. I highly recommend Chappy and Always Affordable plumbing and Hvac."
"Scott and James were great. They got there quickly and diagnosed the problem with my A/C.They did a very thorough job testing everything. Sent me pictures and called to keep me informed. Got it done the next day and everything is working fine. Be glad when I get home so I can enjoy my new system. Thanks guys for a great job."
"Chappy was very helpful. He knew our issue right away, cleaned our coils. He also came on the same day we called and got our AC blowing cold air again."
"After some timing ’curfuffles’ the Tech Jason arrived and not only completed a speedy install on my toilet, he was personable & professional. Because of the timing issues Jason was attentive and showed up with everything needed! No extra store runs 😊 I was very comfortable with having this Tech in my Daughter’s home. We will definitely use this Service again."