Seasonal Home Maintenance Checklist: Preventing HVAC and Plumbing Emergencies
Prevent HVAC emergencies with a seasonal home maintenance checklist. Why proactive scheduling beats waiting for sudden failures. See what needs attention now.



If you are focusing on preparing your exterior plumbing fixtures for the first frost in Loomis, late fall before the first frost is the absolute most critical window to take action. The transition from warm, sunny afternoons to freezing nights happens incredibly fast in the Sierra foothills. Homeowners often get lulled into a false sense of security by mild daytime weather, only to wake up to frost on the ground and ice in their pipes. The core problem is simple but devastating: forgetting to disconnect garden hoses and insulate hose bibs before that initial, unexpected freeze hits.
The decision point for every homeowner is clear. You can either take a proactive approach and winterize your exterior fixtures early, or you can wait for an official freeze warning and scramble in the dark to protect your home. Taking preventative action early ensures your plumbing is secure long before the temperatures dip below freezing. As a provider of honest, transparent residential plumbing services, we see the aftermath of delayed winterization every single year. The damage is entirely preventable with a few simple steps.
Late fall weather in the foothills is notoriously deceptive. You might experience a comfortable 70-degree afternoon that makes winter feel months away. However, as soon as the sun dips below the tree line, the temperature plummets. This rapid cooling effect is what catches so many properties off guard. Your exterior plumbing is on the front lines of this temperature shift.
Common signs that it is time to winterize:
• Overnight lows approaching 40°F: Once the forecast shows temperatures dipping into the low 40s, a sudden freeze is just one weather front away.
• Frost on the windshield: If you are scraping your car windows in the morning, your exposed pipes are already experiencing freezing conditions.
• End of the growing season: When your garden no longer requires daily watering, it is the perfect time to pack away the hoses.
Waiting for a hard freeze to take action is a gamble that frequently results in burst pipes, water damage, and emergency repair calls. Prepping early gives you peace of mind.
Understanding the microclimate of Loomis and surrounding Sierra foothills is essential for protecting your property. Unlike the nearby Sacramento Valley floor, which retains heat slightly longer due to lower elevation and urban density, the foothills experience a much sharper transition into winter. The elevation differences and the unique transition zone climate of Placer County mean that overnight lows drop significantly faster.
Historically, the first frost in this specific region can occur as early as mid-to-late November. While the valley might just see a chilly morning, Loomis properties are often dealing with actual ice formation. These rapid shifts are exactly why generic winterization advice often falls short for foothill residents. You cannot rely on the same timeline as someone living closer to the coast or deep in the valley.
• First Frost Timing — Loomis & Sierra Foothills: Mid-to-late November — Sacramento Valley Floor: Early-to-mid December
• Overnight Temperature Drop — Loomis & Sierra Foothills: Rapid and severe after sunset — Sacramento Valley Floor: Gradual cooling overnight
• Wind Chill Exposure — Loomis & Sierra Foothills: Higher exposure due to elevation — Sacramento Valley Floor: Buffered by urban heat islands
• Action Required — Loomis & Sierra Foothills: Proactive prep in early fall — Sacramento Valley Floor: Prep before major winter storms
Understanding how winter cold snaps affect your pipes and furnace is crucial for whole-home protection. When the ambient temperature drops below 32°F, any standing water in exposed exterior pipes begins to crystallize. Because the foothills lack the insulating heat retention of a dense city grid, your home's exterior walls and fixtures bear the full brunt of the cold air. This localized climate reality makes early action not just a recommendation, but a necessity to avoid structural damage.
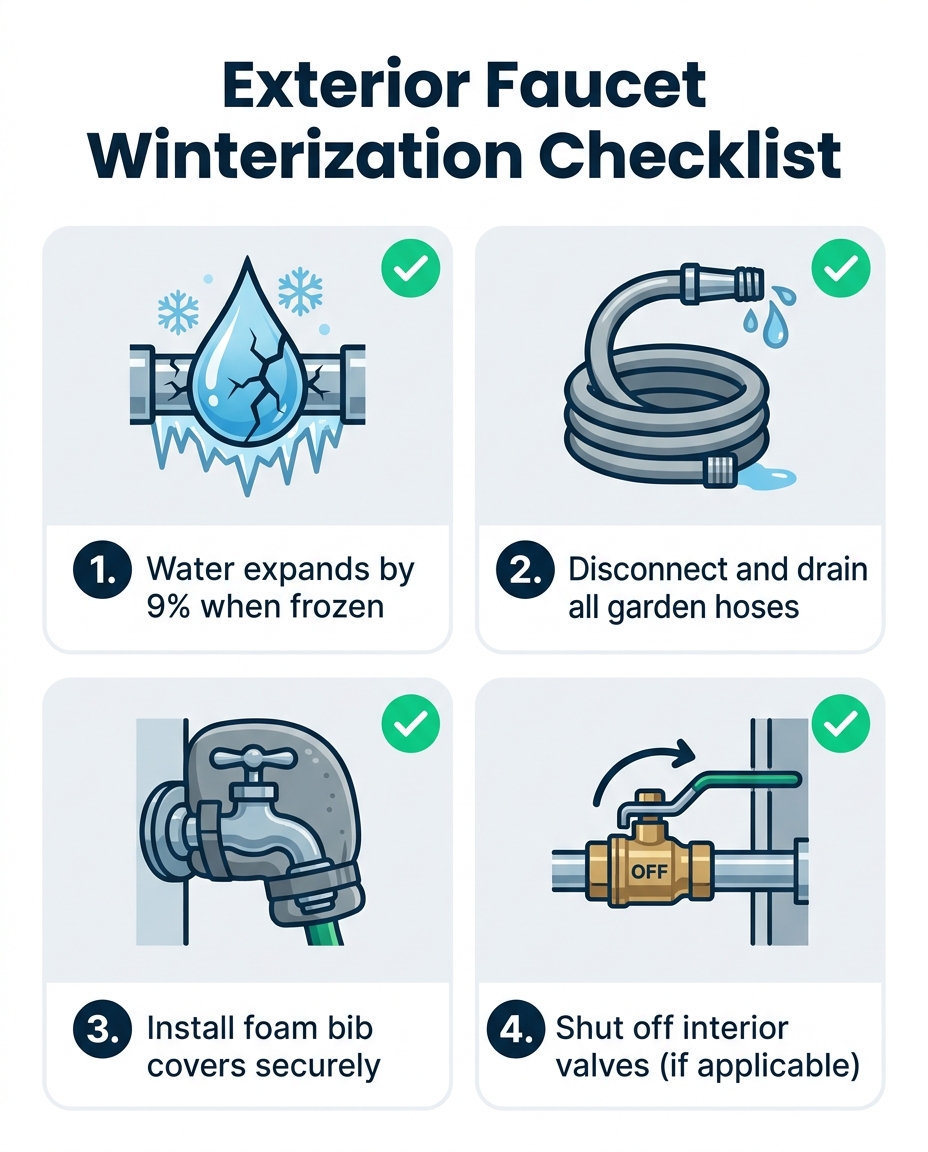
The physics of frozen pipes are unforgiving. When water freezes, it expands by approximately 9%. While that might not sound like a massive increase, the immense pressure this expansion places on standard copper and PVC exterior pipes is staggering. Water is not compressible in its solid state. As ice forms and expands inside a confined pipe, it pushes against the walls of the plumbing with thousands of pounds of pressure per square inch.
Homeowners often assume that a small freeze will simply block the water flow temporarily. The reality is much more destructive. The ice blockage itself rarely causes the pipe to burst right where the freeze occurs. Instead, the expanding ice pushes the remaining liquid water toward closed faucets or interior valves, creating a dramatic spike in water pressure. It is this trapped, pressurized water that eventually forces the pipe to rupture, often at a weak joint inside the wall or directly at the spigot.
Failing to prep in late fall before the first frost can quickly escalate into a massive homeowner headache. Here is how the damage typically unfolds:
• Initial Freezing: Cold air penetrates the exposed metal of the spigot, dropping the water temperature inside below freezing.
• Ice Formation: Ice begins to form, expanding outward and pushing liquid water deeper into the home's plumbing lines.
• Pressure Spike: The trapped liquid water has nowhere to go, causing pressure to build exponentially between the ice blockage and the closed interior valve.
• Rupture: The pipe material fails under the pressure, creating a split or tear.
• The Thaw: When temperatures rise the next day, the ice melts, and water rushes out of the newly formed crack at full municipal pressure.
Preventative steps are a highly effective, budget-conscious strategy to avoid these specific emergencies. A few minutes of preparation now can save you from the extensive damage that requires broken pipe flooding repair. The cost of a few foam covers and the time spent draining hoses is negligible compared to water damage remediation.
The absolute most critical step in preparing your exterior plumbing is dealing with your garden hoses. Leaving a hose connected to your exterior spigot during the winter is the number one cause of frost-damaged plumbing. Even if you have modern, "frost-free" hose bibs installed on your home, leaving a hose attached completely defeats their built-in protection.
A frost-free bib works by placing the actual shut-off valve several inches inside the warm interior wall of your home, allowing the exterior portion of the pipe to drain empty when you turn off the handle. However, if a hose is still connected, it traps water inside that exterior pipe segment. When the temperature drops in Loomis and surrounding Sierra foothills, that trapped water freezes, expands, and backs up directly into the fixture, shattering the internal valve.
1. Turn off the water supply: Ensure the spigot handle is turned completely to the "off" position. Do not over-tighten, as this can damage the internal rubber washers.
2. Disconnect the hose: Unscrew the hose connector from the spigot. If the connection is stuck due to mineral buildup, use a pair of adjustable pliers to gently loosen it.
3. Drain the hose completely: Elevate one end of the hose and walk its entire length, allowing gravity to force all the remaining water out of the opposite end. Trapped water left inside a coiled hose will freeze and cause the rubber or vinyl to split.
4. Inspect for damage: Check the rubber O-ring inside the hose connector. If it is cracked or missing, make a note to replace it in the spring.
5. Store in a protected area: Coil the empty hose loosely to prevent kinks and store it in a garage, shed, or basement. Protecting the material from winter weather and UV exposure will significantly prolong its lifespan.
By simply removing the hose, you allow the spigot to drain any residual water naturally, removing the primary catalyst for expanding ice.
Once the hoses are safely stored away, the next phase of protection involves insulating the exposed metal fixtures. Metal is a highly efficient conductor of temperature. When freezing air hits an exposed brass or copper spigot, that cold transfers rapidly down the pipe toward the interior of your home. A foam hose bib cover acts as an insulating barrier, blocking the freezing outside air while trapping the ambient heat radiating outward from your home's interior walls.
These covers are inexpensive, budget-friendly preventative measures that you can find at any local hardware store. They typically consist of a thick styrofoam dome with a rubber tension tie or a hard plastic shell with internal insulation. Applying them correctly in late fall before the first frost provides a crucial layer of defense against overnight temperature plummets.
1. Clean the area: Wipe down the spigot and the surrounding siding to remove dirt, cobwebs, or debris. A clean surface ensures the cover will sit flush against the wall.
2. Position the loop: Most foam covers use a rubber loop and a plastic sliding lock. Place the rubber loop over the handle or the spout of the spigot.
3. Slide the cover into place: Push the foam dome over the entire fixture until the flat edges of the foam meet the siding of your house.
4. Secure the tension tie: Pull the external string or plastic slide tight, cinching the cover firmly against the wall. The goal is to eliminate any gaps where cold air could slip underneath the foam.
5. Check the seal: Address the different types of exterior siding common in the area. If you have smooth stucco, the foam will usually seal perfectly. If you have lap wood siding or deep textured stone, you may have small gaps where the foam crosses the siding joints. For uneven siding, you can use a small amount of weather-stripping tape around the edge of the foam cover to ensure a completely flush, airtight seal.
This simple process takes less than five minutes per faucet but provides immense protection against the rapid cooling effects of the foothill climate.
For homes equipped with dedicated interior shut-off valves for exterior plumbing, isolating the water supply offers the highest level of protection. Not every home has this feature, but newer constructions or homes that have undergone plumbing updates in Loomis and surrounding Sierra foothills often do. By shutting off the water flow from the inside, you guarantee that no pressurized liquid is sitting in the vulnerable exterior portion of the pipe.
It is important to clarify the distinction between safe homeowner prep and tasks that require a professional. Turning a designated shut-off valve is a standard homeowner maintenance task. However, if a pipe has already burst, or if your valves are heavily corroded and will not turn easily, you must call a licensed professional. Forcing a stuck valve can break the pipe internally, turning a preventative measure into an immediate emergency.
1. Locate the interior valves: Check your garage, basement, utility room, or crawlspace access points. Look for a pipe leading directly out toward the exterior spigot. The valve will typically be a lever (ball valve) or a round wheel (gate valve).
2. Turn off the supply: Turn the lever so it is perpendicular to the pipe, or turn the wheel clockwise until it stops. This stops water from flowing to the outside spigot.
3. Open the exterior spigot: Go back outside and turn the spigot handle to the "on" position. This allows any residual water trapped between the interior valve and the exterior spout to drain out completely.
4. Leave the exterior valve open: Advise leaving the exterior valve open slightly during the winter. If any tiny amount of water remains inside the pipe, leaving the valve open gives it room to expand safely if it freezes, rather than building up pressure against the metal.
5. Apply the foam cover: Even with the water shut off from the inside, you should still apply the foam hose bib cover as an added layer of insulation for the pipe itself.

Even with the best intentions, rapid weather changes can sometimes catch homeowners off guard before they have a chance to prepare. When an unexpected freeze hits the Loomis and surrounding Sierra foothills, the resulting damage requires immediate attention. A cracked spigot might not reveal itself while the water is frozen solid, but the moment the afternoon sun thaws the ice, the consequences become very clear.
One local homeowner experienced this exact situation last fall. A sudden overnight freeze caused their front spigot to develop a hairline crack. When temperatures rose the next day, the ice melted and the broken fixture began flooding the driveway. The immediate need was to shut off the main home water supply to stop the flow, which is always the first critical step in any plumbing emergency. Because the situation required cutting into the line and replacing the damaged fixture, they reached out for emergency assistance.
When emergencies do happen, a fast response is vital to prevent water from pooling against the foundation or seeping into the home. In this specific scenario, a technician arrived within thirty minutes, assessed the cracked fixture, and provided a clear explanation of the repair options. By focusing on honest, transparent, and budget-conscious repair solutions, the spigot was replaced and water service to the home was restored quickly without breaking the bank.
What to do if you suspect a cracked spigot:
• Locate your main shut-off: Know exactly where your home's main water shut-off valve is located (usually near the street meter or where the main line enters the house).
• Look for pooling water: Inspect the ground directly beneath your exterior faucets after a hard freeze thaws out.
• Check water pressure: If you notice a sudden drop in water pressure inside the home, it could indicate a leak somewhere in the system.
While preventative preparation is always the best strategy, knowing that trusted local help is available ensures that a cracked pipe does not turn into a long-term disaster.
While exterior spigots are the most obvious targets for freezing temperatures, they are not the only fixtures vulnerable to dropping temperatures. A holistic approach to home winterization requires looking beyond the exterior walls. Any plumbing located in unheated spaces is at risk during a severe cold snap in late fall before the first frost.
Pipes running through crawlspaces, unfinished basements, or uninsulated garages are highly susceptible to freezing. These areas lack the ambient heat of your living spaces. Applying foam pipe insulation sleeves to these exposed lines is a straightforward way to protect them. The sleeves are pre-slit and simply snap over the copper or PVC pipes, providing a necessary thermal barrier.
Additionally, your water heater works overtime during the colder months. As the incoming municipal water temperature drops, your system has to expend more energy to heat the water to a comfortable level. Ensuring proper water heater protection is vital for consistent performance. If your water heater is located in a chilly garage, wrapping it in an approved insulation blanket can significantly improve its efficiency and protect the surrounding connection lines from freezing.
Taking the time to insulate vulnerable indoor pipes and service your water heater early in the season ensures that your entire plumbing system remains resilient, no matter how cold the foothill nights get.
Outside pipes generally begin to freeze when the ambient temperature drops to 20°F or below for several consecutive hours. However, exposed exterior spigots and uninsulated pipes subject to wind chill can freeze even when the thermometer reads slightly higher, closer to 32°F. Because temperatures in the foothills can plummet rapidly overnight, you should prepare your pipes well before the forecast predicts a hard freeze.
You should cover your outside faucets in late fall, typically by mid-to-late November in the Sierra foothills. It is always better to install the foam covers before the first frost hits rather than waiting for an official freeze warning. Leaving them covered throughout the entire winter season provides continuous protection against unpredictable temperature drops.
Yes, it is highly recommended to cover even frost-free faucets. While frost-free bibs are designed to keep water away from the exterior wall, extreme cold and wind chill can still penetrate the metal fixture and reach the internal valve. Adding a foam cover provides an extra layer of insulation that ensures the internal mechanisms remain safe during severe cold snaps.
Winterizing an outside faucet starts with completely disconnecting and draining all garden hoses. Next, if your home has an interior shut-off valve for the exterior line, turn it off and open the outside spigot to drain any residual water. Finally, secure a foam hose bib cover tightly over the spigot, ensuring it sits flush against the exterior siding to block out cold air.
If your exterior spigot is already frozen, do not attempt to force the handle open or apply direct high heat like a blowtorch, as this can cause the pipe to burst. Instead, shut off the main water supply to your home immediately to prevent flooding when the ice thaws. Wrap the frozen pipe in heavy towels soaked in hot water to thaw it slowly, and check carefully for hairline cracks once the ice has melted.
Ready to secure your home for the winter? Taking action in late fall before the first frost is the smartest way to protect your property. Whether you need help identifying vulnerable pipes, resolving a cracked spigot, or looking for clear, localized, actionable steps to safeguard your system, ensuring your exterior plumbing is protected before freezing temperatures arrive gives you true peace of mind.
See what our satisfied customers have to say about their experience with Always Affordable
Plumbing & HVAC.

"Chappy was very skilled in his knowledge of my HVAC unit. I greatly appreciate the quick response and experienced tech. The whole endeavor was made less stressful by his humor and honest conversation. I find comfort in knowing I now have a shop i trust for the next time."
"Tony, James, Ronnie did an amazing job setting up our new AC! They were quick, efficient, considerate, and polite! We appreciate them scheduling us in on such short notice. Definitely recommend this company!"
"Prompt, professional service with kindness and care. They came out to address both plumbing and AC issues. I received a courtesy call before they arrived. All issues were resolved the same day with integrity and respect. Thankful for businesses like this. Absolutely recommend to those that I love."
"Excellent service! Jason came out promptly and in addition to doing my outside faucet he also put in new irrigation equipment! All done perfectly! Jason was lovely"
"Honest with the assessment; friendly and good manners. No high pressure sales. Just good to honest "tell it like you see it" Thought my kitchen disposer needed an overhaul. But Jason, there Plumber gave me an honest lesson on what was really happening. Saved me hundreds, if I went the route of replacing. Thank you!"
"Absolutely 5 stars. If you are looking for affordable ,professional and kind. Chappy was excellent and very knowledgeable . I called in the morning because my air conditioner stopped working he was here within hours and fixed my air with a smile. I highly recommend Chappy and Always Affordable plumbing and Hvac."
"Scott and James were great. They got there quickly and diagnosed the problem with my A/C.They did a very thorough job testing everything. Sent me pictures and called to keep me informed. Got it done the next day and everything is working fine. Be glad when I get home so I can enjoy my new system. Thanks guys for a great job."
"Chappy was very helpful. He knew our issue right away, cleaned our coils. He also came on the same day we called and got our AC blowing cold air again."
"After some timing ’curfuffles’ the Tech Jason arrived and not only completed a speedy install on my toilet, he was personable & professional. Because of the timing issues Jason was attentive and showed up with everything needed! No extra store runs 😊 I was very comfortable with having this Tech in my Daughter’s home. We will definitely use this Service again."